The AutoCAD XCLIP Command
by Jeff Weber
(Vincennes, Indiana)


|


|


|

|
Clipping XREF’s in AutoCAD can be a productive tool. If you have been using XREFs, or if you read the previous tip, you may be getting used to them.
Now let’s look at how we can modify the XREFs.
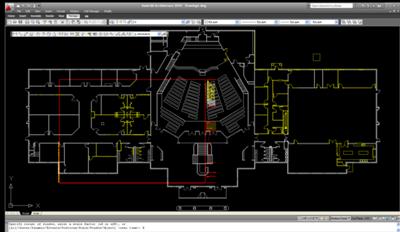
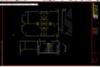
Say you want to load a floor plan.
We are going to want to use this floor plan as an “enlarged plan”, so we will insert it so that when it prints it will be ¼” = 1’-0”.
We already know that the plan will just fit on a sheet at 1/8” so how do we expect to do an enlarged plan and use XREFs?
That is where XCLIP comes in.
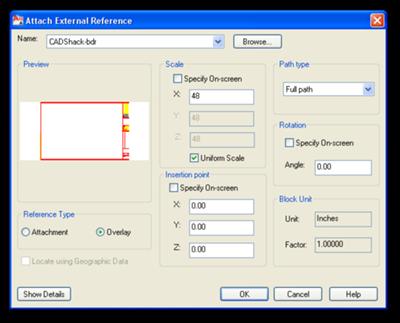
For this tip I will assume that you have either read the previous tip or you are familiar enough with XREFs that you can get to the “Attach External Reference” dialogue box.
Once there you will see the familiar “Scale” and “Insertion Point” boxes.
We are going to be using a 24"x36" sheet of paper.
As noted above we want the drawing to scale out at ¼” = 1’-0”.
Follow the process of inserting your title block just like before except this time instead of putting 96 in the scale box put in 48.
If it is not already done, un-check the "Specify on Screen" check box in the Scale area.
Also make sure that the “Uniform Scale” check box is checked.
In the scale box you will want to put 1.
This way the floor plan will be inserted at full scale and since your title block has been inserted at ¼” scale, when you plot you will have a ¼” scale “enlarged plan”.
All of the other boxes should change too, since you checked the uniform scale box.
Make sure that the “Specify On Screen” check box is checked in the Insertion Point area.
Now everything should be set up, click OK.
AutoCAD now expects you to place your floor plan where you want it.
As you will see the floor plan will not fit on the sheet as it is right now, that is where the XCLIP command comes in handy.
Once you have placed your floor plan type XCLIP on the command line.
After you have hit enter AutoCAD wants to know “what do you want to clip?”
The command line should say “Select Objects”.
Click on the floor plan you just placed in the drawing and hit enter.
AutoCAD then gives you several options, ON/OFF, Clip Depth, Delete… etc.
The option we are interested it the default, “New”.
So at this point you can just hit Enter.
Now you are asked to specify the type of boundary you want.
You can select an already pre-defined polyline, pick polygon points, pick two points for a rectangle, or do an invert of and already existing clipped area.
Again we will use the default of “Rectangular”, so at this point just hit enter again.
Just like in the rectangle command AutoCAD wants you to pick the two points of the rectangle.
Pick the first point the select the opposite diagonal point to establish your rectangle.
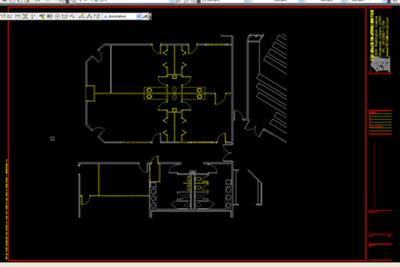
Once you have picked the second point AutoCAD automatically “Clips” the floor plan.
Now you have a clipped floor plan that will fit within your title block.
If needed, select your floor plan and move it so that it all fits within the title block.
At this point you can plot your drawing at ¼” scale and you have an enlarged floor plan.
One of the other options that is useful in the XCLIP command is the “Select Polyline” option.
This option is beneficial when you want to show an odd shaped plan.
After you have attached an XREF use the polyline command to place a polyline around the area to be clipped.
Initiate the XCLIP command as before.
Select your plan.
Hit enter to select the default option of New.
After you have hit enter, this time hit “S” for select polyline.
You are then prompted to select a polyline.
Select the polyline you just drew and AutoCAD immediately clips the plane around the polyline.
The Polygonal option works basically the same way except for that option you do not have to have a pre-exiting polyline.
You just pick the points where you want the polygon to clip.
XCLIP is a very useful tool when using XREF's in AutoCAD.
Join in and write your own page! It's easy to do. How? Simply click here to return to AutoCAD Tips.
Sign up for our FREE CAD Tips and Tricks Newsletter:
"The CAD Times"
Join "The CAD Times" Newsletter Along With 5,000 Subscribers

Recent Articles
-
What is AutoCAD Used For?
Jan 27, 23 07:50 PM
If you ever wondered what is AutoCAD used for, read on... -
Viewport turns black
Oct 29, 21 09:34 AM
I was giving a dog file to work on, and when I try to insert a north arrow into layout viewport, the viewport turn black when I move my cursor into the -
Converting .pdf's to .dwgs
Oct 29, 21 09:31 AM
I get a LOT of plans from clients where they used some cad program that will only create .pdf files or they found a plan on a site and it came to them